
Register for a blog account at http://www.blogger.com/home
2. Click on create a new blog on the home page. You can also view your other blogs if you have already created them and edit or publish new posts.

3. After you have clicked on new blog - a pop up window will appear as shown below. Type in the title of your blog as well as the url address. You will be prompted to change the address if it has already been taken.

4. After you have created your blog, you can start a new post.

5. You need to enter a title for your post and remember to click on 'Publish' to post it on your blog. However if you choose not to publish it yet, you can click on save to save what you have written. You can insert pictures and video using the menu above the space which you write your post. You can also add a label to categorise the content of your posts.


6. Adding a Message Box
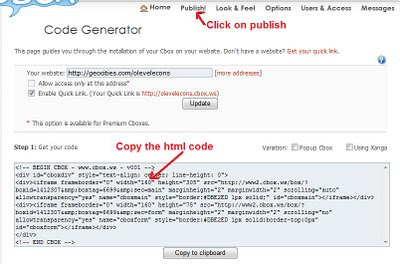
You can get your own cbox (chatbox for message) at http://cbox.ws/?r=3-2160578 After you have created an account with cbox, click on "publish" and you will see the html code. You can then copy the code into your blog design.
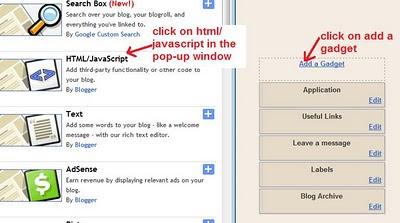
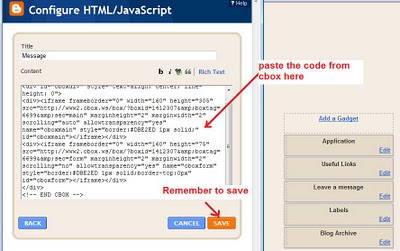
 Click on "design" on your dashboard, followed by "page elements" and then "add a gadget" - "html/javascript". Just paste the code which you have generated from cbox in the popup window.
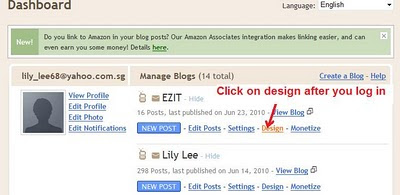
 You can also control the messages posted by banning those who spam and delete the messages which you feel is inappropriate. With cbox- you can also trace the IP address of those who post the message.
7. Adding the flag counters
Log onto http://www.flagcounter.com/index.html to create your counter and then copy the html code.
In your blogger.com, follow the same steps as for adding the gadget for cbox earlier.
8. Adding the count down timer for an event on the side bar
You can get the html code from http://www.usflashmap.com/component/countdown_timer.htm?component_cdt=1
Again add the gadget - html code